Sep 28, 2019

Swashbuckle .NET Web API and DelveApi from SharePoint 2019


If you have a .NET Web API project that is using CSOM to communicate with SharePoint 2019, and you want the API to be documented with Swagger (Swashbuckle) you may end up getting the following error:

How to reproduce the problem:

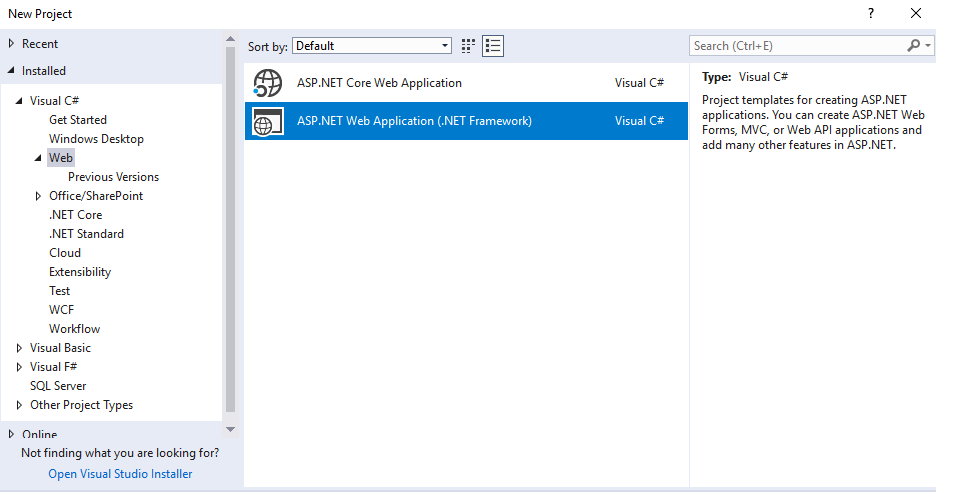
  • Create new ASP.NET Web Application. You can keep the defaults settings.

  • Install Swashbuckle NuGet package.

When you start your application and access the Swagger endpoint, you will see your default API controller has been documented.

  • Install Microsoft.SharePoint2019.CSOM NuGet package

When you now try to browse the swagger documentation, you get the following error:
500 : {"Message":"An error has occurred.","ExceptionMessage":"Not supported by Swagger 2.0: Multiple operations with path '_vti_bin/DelveApi.ashx/{version}/groups' and method 'GET'. See the config setting - \"ResolveConflictingActions\" for a potential workaround.
Swagger is trying to document the DelveApi endpoints coming from SharePoint.
You can see the OOTB API documentation is listing quite a few DelveApi endpoints.

    How to fix it

    1. In SwaggerConfig.cs and make the following changes
    • add reference to Linq
    using System.Linq;
    • in EnableSwagger action add the following line of code
    c.ResolveConflictingActions(apiDescriptions => apiDescriptions.First());
    GlobalConfiguration.Configuration
                         .EnableSwagger(c =>
                         {
                             c.SingleApiVersion("v1", "WebApplication1");
                             c.ResolveConflictingActions(apiDescriptions => apiDescriptions.First());
                             c.DocumentFilter<SwaggerDocumentFilterSharePoint>();
                         })
                         .EnableSwaggerUi(c =>
                         {
                             c.DocumentTitle("Web Application REST");
                         });
    2. Implement IDocumentFilter and modify the EnableSwagger configuration in SwaggerConfig.cs
    public class SwaggerDocumentFilterSharePoint : IDocumentFilter
       {
           public void Apply(SwaggerDocument swaggerDoc, SchemaRegistry schemaRegistry, IApiExplorer apiExplorer)
           {
               var paths = new Dictionary<string, PathItem>(swaggerDoc.paths);
               swaggerDoc.paths.Clear();
               foreach (var path in paths)
               {
                   if (!path.Key.Contains("_vti_bin/DelveApi.ashx") && !path.Key.Contains("/api/DelveApi"))
                       swaggerDoc.paths.Add(path);
               }
           }
       }

      Read full article!

      Oct 12, 2017

      Note board comment notifications

      It is common case to request notification for the comments someone makes in your pages through Note Board web part. Since this is not supported out-of-the-box, the goal could be fulfilled only through custom code or 3rd party solution.
      Next objectives must be addressed for completing the task:
      • what will trigger the notification – time based timer job (implies WSP package on prem or Azure hosted .Net code in o365) or hitting the "Post" button in the Note Board web part (JavaScript somehow…)
      • what will notification include – I guess the bare minimum that would be required is what is the page and what the last posted comment was
      • what kind of notification is required – email or something else
      The shortest path is going with JavaScript code that is triggered after the "Post" button has been hit by the end-user, which triggers email notification with the comment details to be sent out.
      Here is how to achieve this:
      • subscribe to the "Post" button for the Note Board web part after the comment has been posted to the discussion history
      $(".ms-socialCommentContents input[id$='_PostBtn']").click(function () {

             //todo: your custom code here

             return false;

         });
      • read with SocialDataService.asmx the last comment for this page
      function GenerateDataXML (url) { 


             var d1 = new Date ();

             var d2 = new Date ( d1 );

             d2.setHours ( d1.getHours() - 1 );

             var d3 = d2.toISOString();;


             var soapXml = "<?xml version='1.0' encoding='utf-8'?><soap:Envelope xmlns:xsi=\"http://www.w3.org/2001/XMLSchema-instance\" xmlns:xsd=\"http://www.w3.org/2001/XMLSchema\" xmlns:soap=\"http://schemas.xmlsoap.org/soap/envelope/\">" +   

              "<soap:Body>" +   

              "<GetCommentsOnUrl xmlns=\"http://microsoft.com/webservices/SharePointPortalServer/SocialDataService\">" +   

                  "<url>" + url + "</url>" +   

                  "<maximumItemsToReturn>5</maximumItemsToReturn>" +

                  "<startIndex>0</startIndex>" +

                  "<excludeItemsTime>" + d3 + "</excludeItemsTime>" +

              "</GetCommentsOnUrl>" +   

              "</soap:Body>" +   

              "</soap:Envelope>" ;


              return soapXml;   

          }   
      This example returns last 5 comments made within last hour.
      Then, we can fetch the last comment made and retrieve the text and use who posted it:
      $(content).find('SocialCommentDetail').each(function (index) {

                  if (index == 0)

                  {

                      var comment = $(this);

                      var owner = comment.find('Owner')[0].innerHTML;

                      var text = unescape(comment.find('Comment')[0].textContent);


                      callback(owner, text);


                      return false;

                  }


              });
      • then we use SP.Utilities.Utility.SendEmail to send email
      Below is the source code of all actions:
      function ReturnLastComment(url, callback) {   

          var dataXML = GenerateDataXML([url]); 


           var soapAction = "http://microsoft.com/webservices/SharePointPortalServer/SocialDataService/GetCommentsOnUrl";

           var svcUrl = window.location.protocol + "//" + window.location.host + _spPageContextInfo.webServerRelativeUrl + "/_vti_bin/SocialDataService.asmx";

           $.ajax({   

              url: svcUrl,   

              data: dataXML,  

              headers: {

                  'SOAPAction': soapAction,

                  'Content-Type': 'text/xml; charset=\"utf-8\"',

                  'Accept': 'application/xml, text/xml, */*'

              },        

              dataType: "xml",        

              method: "POST",   

              transformRequest: null,

              success: processResult,   

              error: function (request, error) {


                 console.log('error: ' + request.responseText);

              }    


           })   


           //Following function generates the require soap XML   

           function GenerateDataXML (url) { 


              var d1 = new Date ();

              var d2 = new Date ( d1 );

              d2.setHours ( d1.getHours() - 1 );

              var d3 = d2.toISOString();;


              var soapXml = "<?xml version='1.0' encoding='utf-8'?><soap:Envelope xmlns:xsi=\"http://www.w3.org/2001/XMLSchema-instance\" xmlns:xsd=\"http://www.w3.org/2001/XMLSchema\" xmlns:soap=\"http://schemas.xmlsoap.org/soap/envelope/\">" +   

               "<soap:Body>" +   

               "<GetCommentsOnUrl xmlns=\"http://microsoft.com/webservices/SharePointPortalServer/SocialDataService\">" +   

                   "<url>" + url + "</url>" +   

                   "<maximumItemsToReturn>5</maximumItemsToReturn>" +

                   "<startIndex>0</startIndex>" +

                   "<excludeItemsTime>" + d3 + "</excludeItemsTime>" +

               "</GetCommentsOnUrl>" +   

               "</soap:Body>" +   

               "</soap:Envelope>" ;


               return soapXml;   

           }   


           function processResult(content, txtFunc, xhr) {  


               $(content).find('SocialCommentDetail').each(function (index) {

                   if (index == 0)

                   {

                       var comment = $(this);

                       var owner = comment.find('Owner')[0].innerHTML;

                       var text = unescape(comment.find('Comment')[0].textContent);


                       callback(owner, text);


                       return false;

                   }


               });

           }  

      }


      function bindCommentsEvents()

      {

          $(".ms-socialCommentContents input[id$='_PostBtn']").click(function () {


              var currentPageUrl = window.location.protocol + "//" + window.location.host + _spPageContextInfo.serverRequestPath;

              ReturnLastComment(currentPageUrl, function (owner, text) {

                  var result = "last comment: " + owner + "; " + text;

                  //alert(result);


                  var mailBody = "<br>commented by: " + owner + "<br>" + "page: " + currentPageUrl +  "<br>comment: " + text;

                  processSendEmails(mailBody)

              });


              return false;

          });

      }

      function processSendEmails(body) {


          var from = 'no-reply@domain',

              to = 'xxxx@domain',

              body = 'A comment has just been added to one of your pages.\n' + body,

              subject = 'New Comment';


          // Call sendEmail function

          //

          sendEmail(from, to, body, subject);

      }


      function sendEmail(from, to, body, subject) {

          //Get the relative url of the site

          var siteurl = _spPageContextInfo.webServerRelativeUrl;

          var urlTemplate = siteurl + "/_api/SP.Utilities.Utility.SendEmail";

          $.ajax({

              contentType: 'application/json',

              url: urlTemplate,

              type: "POST",

              data: JSON.stringify({

                  'properties': {

                      '__metadata': {

                          'type': 'SP.Utilities.EmailProperties'

                      },

                      'From': from,

                      'To': {

                          'results': [to]

                      },

                      'Body': body,

                      'Subject': subject

                  }

              }),

              headers: {

                  "Accept": "application/json;odata=verbose",

                  "content-type": "application/json;odata=verbose",

                  "X-RequestDigest": jQuery("#__REQUESTDIGEST").val()

              },

              success: function(data) {


                  console.log('Email Sent Successfully');

              },

              error: function(err) {


                  console.log('Error in sending Email: ' + JSON.stringify(err));

              }

          });

      }
      Caveats:
      • Outgoing email settings must be configured if on-premises
      • make sure the function that subscribes to click button of the Post button (bindCommentsEvents) is invoked on your page load – it could be through Script Editor web part
      • if there is more than one web part on your page you may need to adjust your jquery selector

      Read full article!

      Sep 19, 2017

      Delete SharePoint calendar event with JavaScript


      Technorati Tags: ,
      If you ever need to override ribbon actions or to implement custom calendar in SharePoint working with the out-of-the-box calendar list, you will end up implementing create, update and delete operations for your events.
      The possibility of having re-occurring events makes the implementation of delete operation quite complex, because you would usually aim to delete single occurrence rather the whole series of given event.
      The best approach would be to find out how to invoke the ootb function of the operation and develop your own custom code around it.
      The server side logic implementation for the calendar is residing in Microsoft.SharePoint.ApplicationPages.Calendar.dll , and the client one could be found in SharePoint hive folder TEMPLATE\LAYOUTS - SP.UI.ApplicationPages.Calendar.js (respectively SP.UI.ApplicationPages.Calendar.debug.js).
      If you search in this JavaScript file by "delete", you will find right away next function:
      deleteItem: function SP_UI_ApplicationPages_CalendarContainer$deleteItem$in(itemId) {

              var $v_0 = window['ctx' + this.$U_1.ctxId];

              var $v_1;

              var $v_2 = $v_0['RecycleBinEnabled'];


              if (itemId.indexOf('.0.') !== -1 || itemId.indexOf('.1.') !== -1) {

                  $v_1 = SP.Res.calendarDeleteConfirm;

              }

              else if (!SP.UI.ApplicationPages.SU.$1($v_2) && $v_2 === '1') {

                  $v_1 = window.Strings.STS.L_STSRecycleConfirm_Text;

              }

              else {

                  $v_1 = window.Strings.STS.L_STSDelConfirm_Text;

              }

              if (!confirm($v_1)) {

                  return;

              }

              this.$c_1.$9M_0(itemId);

          }
      It looks to be exactly the function that is called when we press delete:
      deleteEvent_UI
      The problem is that the delete action and invocation of the server side happens through calling this.$c_1.$9M_0(itemId);
      There are two challenges here:
      • What is the value of the argument itemId that we must provide to make a valid invocation
      • Can we directly call $c_1.$9M_0 function
      The latter is not a good approach considering Microsoft may change it in future upgrades/releases.
      So, the only feasible solution would be how to call the deleteItem function and to pass valid argument value to it, so it can carry out the action for us.
      If you scroll up in the file in the SP.UI.ApplicationPages.Calendar.debug.js, you will find out that the deleteItem function is defined for SP.UI.ApplicationPages.CalendarContainer object.
      Calling SP.UI.ApplicationPages.CalendarInstanceRepository.firstInstance() is giving us the reference we need.
      The value we need to pass is the value of the ID from the url.
      It could be just a figure: ID=1, or combination of ID and time for repeating events: ID=2.0.2017-09-03T15:00:00Z
      You can easily parse the URL and get the values from query string:
      var readQueryString = function (src, key) {

          key = key.replace(/[*+?^$.\[\]{}()|\\\/]/g, "\\$&"); // escape RegEx meta chars

          var match = src.match(new RegExp("[?&]" + key + "=([^&]+)(&|$)"));

          return match && decodeURIComponent(match[1].replace(/\+/g, " "));

      }

      var id = readQueryString(this.location.href, "ID");
      SP.UI.ApplicationPages.CalendarInstanceRepository.firstInstance().deleteItem(id);
      You can give it a try in the console:
      deleteEvent_JS
      The solution about has been validated for on premises implementation, but it should be also applicable to o365 environment.
      Read full article!

      Feb 9, 2014

      Acceptance Stage in CI Jenkins and Psake

      Related posts:
      The “ACCEPTANCE STAGE” is the third job in my delivery pipeline.
      Please, refer the general article for setting up the delivery pipeline with Jenkins and Psake here.
      You can take a look on the article dedicated to preceding jobs in my pipeline for build stage here and commit stage here.
      The primary job of  acceptance stage is to execute acceptance testing, which in my case is based on Selenium. Its job can be summarized with 2 major activities:
      • Deploy the artifacts that are output of the  build stage instance, and that are tested by the  commit stage instance.
      • Executing the Selenium tests with NUnit
      1. Deploy artifacts
      Deployment task itself is comprised of 2 sub-tasks:
      • Deploying the Web Application to dedicated Front-End server, that is not the build-server.
      • Deploying the database with SSDT to dedicated database server, that is not the build-server.
      To get the REVISION context from the upstream job in the pipeline instance (which is the commit stage), mark the job as parameterized and define the same name that is pointed in the build trigger for the “COMMIT STAGE” job.
      AcceptanceStageDefinition

      The “build” step is quite simple in this case. It contains only “build.cmd”, that was reviewed in the previous articles.
      The functionality related to deploying web application and database are executed in “acceptancestage.ps1”.

      If you don’t use “msbuild” command line for deploying your web packages to dedicated machine ( that is accessible in your network), you have to implement this with custom programmatically logic.
      In my case I did it with Powershell WebAdministration module.

      So, the cmdlets from the module that creates web site and applications have to be executed in the context of the machine that they will reside in. And this machine is different than the build machine that host Jenkins and triggers the instance of the “ACCEPTANCE STAGE” job.
      One possible option to fulfill this is to build web service, responsible for deployment and web site creation. It can be invoked by the build machine. Unfortunately, this implies to more development efforts, integration and authentication concerns, which technically becomes a complication in the delivery pipeline.

      The other approach (the one I chose) is to use PowerShell remoting, which will allow me to call the cmdlets from WebAdministration module in the context of the web server, where I want to deploy my web package.
      There is a prerequisite for this. The front-end server (webhost in the script), should expose shared folder, in which the artifacts will be copied before executing the deploy DeployWebProject.ps1 with remoting.
      The script uses WebAdministration module of IIS, loops through all published web sites on the front-end server in order to extract and calculate the port of new site that is to be published.
      Then New-Website and New-WebApplication command are used. After the web application is deployed, its web config is modified , so the connection string has been properly set up.
      DeployWebProject.ps1 is located on the Jenkins server, but if it refers other scirpts or resources they should be placed on the “remote” front-end server.

      task DeployApplication { 

          $webhost = "\\webhostIP" 
          $webhostPassword = "webhostPassword"
          $dbhost = "\\dbhostIP"
          $dbhostPassword =  "dbHostPassword"
          Write-Host -ForegroundColor "Green" -BackgroundColor "White" "Start DeployApplication task..."
          If ($revision)
          {
              Write-Host -ForegroundColor "Green" -BackgroundColor "White" "Start deploying application..."
              $p = Resolve-Path .\       
              #Authenticate as User1 with needed privileges.
              $password = convertto-securestring $webhostPassword -asplaintext -force
              $credentials = new-object -typename System.Management.Automation.PSCredential -argumentlist "webhost\User1",$password
              #copy artifacts
              Write-Host "Moving artifacts packages on the front-end server hard drive..."
              $artifacts_directory = Resolve-Path .\Artifacts\$revision\Source\Packages

              NET USE "$webhost\ci\$revision" /u:webhost\User1 $webhostPassword 
              robocopy $artifacts_directory  "$webhost\ci\$revision" WebProject.zip
              net use "$webhost\ci\$revision" /delete
              Write-Host "Moving artifacts done..."

              #copy deploy scripts
              $deployScriptsPath =  Resolve-Path .\"DeployScripts"    
              NET USE "$webhost\CI\powershell" /u:webhost\User1 $webhostPassword 
              robocopy $deployScriptsPath "$webhost\CI\powershell" PublishWebSite.ps1
              net use "$webhost\CI\powershell" /delete      
              $dbServer = "dbServerConnectionStringName"  
              $dbServerName = "dbServerName"
              $sqlAccount = "sqlAccount"
              $sqlAccountPassword = "sqlAccountPassword"  

              invoke-command -computername webhostIP -filepath  "$p\DeployScripts\DeployWebProject.ps1"  -credential $credentials  -argumentlist @($revision, $dbServer, $revision, $sqlAccount, $sqlAccountPassword)     

              Write-Host -ForegroundColor "Green" -BackgroundColor "White" "Start deploying database..."
              #...pretty much the same
          }
          else
          {
              Write-Host "Revision parameter for the Acceptance Stage job is empty. No artifacts will be extracted. Job will be terminated..."

              throw "Acceptance Stage job is terminated because no valid value for revision parameter has been passed."
          }
      }

      The link below gives explanation how the credentials might be stored encrypted in a file, rather than being used plain text in ps1 script.

      http://blogs.technet.com/b/robcost/archive/2008/05/01/powershell-tip-storing-and-using-password-credentials.aspx

      Below is the beginning of the DeployWebProject.ps1 script:
      param(

       [string]$revision = $(throw "revision is required"),
       [string]$dbServer = $(throw "db server is required"),
       [string]$dbName = $(throw "db name is required"),
       [string]$sqlAccount = $(throw "sql acocunt is required"),
       [string]$sqlAccountPassword = $(throw "sql account password is required")
       )
          $p = Resolve-Path .\
          Write-Host $p    
          Set-ExecutionPolicy RemoteSigned –Force


      robocopy with impersonation is used, because the context of the Jenkins jobs has not permission over the shared folder by default. The context is the user that runs the windows service.

      robocopy copies the artifacts from C:\CI\Artifacts\$revision to $webhost\ci\$revision (this might be created dynamically by the deploy ps1 script).

      After the web deployment is completed the shared folder content is cleared.

      Deploying database uses pretty much the same approach. Artifacts that are need here are:

      • Dacpac file
      • Publish database profile file
      • Init.sql scripts that can be used for creating the initial data needed for the web application to be operational.
      *.dacpac file is output file of your SSDT project and should be archived as artifact in the “Build Stage”, after database project is build. It is available in the bin\Debug|Release folder of the SSDT project.

      In order to generate database publish profile, open up your ProjectDB.sln and right click on the SSDT project (named ProjectDB) -> Publish.


      CreatePublishingDBProfileXml


      The click “Save Profile As…” and save the file as ProjectDB.publish.xml. The file is stored on the Jenkins file system.

      Below is sample content of the file:
      <?xml version="1.0" encoding="utf-8"?>
      <Project ToolsVersion="4.0" xmlns="http://schemas.microsoft.com/developer/msbuild/2003">
        <PropertyGroup>
          <IncludeCompositeObjects>True</IncludeCompositeObjects>
          <TargetDatabaseName>4322</TargetDatabaseName>
          <DeployScriptFileName>4322.sql</DeployScriptFileName>
          <TargetConnectionString>Data Source=dbserver;Initial Catalog=xxx;User ID=xxx;Password=xxx;Pooling=False</TargetConnectionString>
          <ProfileVersionNumber>1</ProfileVersionNumber>
        </PropertyGroup>
      </Project>

      Artifacts are copied to shared folder $dbhost\CI\$revision on the database server. Then, again PowerShell remote execution is used alike for web site deployment.

      The publish xml is copied on the $dbhost\CI\$revision folder from the Jenkins machine file system location. Its content and connection string are adjusted. The newly created database has the name of the revision number, so it can be easily recognized when troubleshooting is required. Also the publishing profile name is renamed to ProjectDB.publish.$revision.xml, after it is copied to the appropriate folder.

      Below is the deployment script for the database:
      param(
       [string]$revision = $(throw "revision is required"),
       [string]$dbServer = $(throw "db server is required"),
       [string]$sqlAccount = $(throw "sql acocunt is required"),
       [string]$sqlAccountPassword = $(throw "sql account password is required")
       )

          $pathToPublishProfile = "C:\CI\{0}\ProjectDB.publish.{0}.xml" -f $revision
          $dacpacPath = "C:\CI\{0}\ProjectDB.dacpac" -f $revision
          $remoteCmd = "& `"C:\Program Files (x86)\Microsoft SQL Server\110\DAC\bin\SqlPackage.exe`" /Action:Publish  /Profile:`"$pathToPublishProfile`" /sf:`"$dacpacPath`""

          $sqlInit = "sqlcmd -S {0}  -U {1} -P {2} -d {3} -i `"C:\CI\{3}\ProvideInitData.sql`"" -f $dbServer, $sqlAccount, $sqlAccountPassword, $revision

          Invoke-Expression $remoteCmd
          Invoke-Expression $sqlInit
          Write-Host "Creating database finished.."


      As you can see the artifacts are referred as local resources to db server, regardless the DeployDB.ps1 is executed from the build server.

      After successful deployment the temp content $dbhost\CI\$revision and $webhost\CI\$revision is cleaned up and the folders are deleted.

      At this point you should be able to browse your recently deployed web application, to log in and to work with it. Dedicated database named with the revision number is created for each web deployment.

      2. Execute Selenium tests

      In the previous article I showed how unit tests can be executed and integrated in Jenkins with bat file.

      Here is how i did it with PowerShell.

      $nunitProjFile = "$p\Artifacts\{0}\Source\Automation\WebProject.SeleniumTests\SeleniumTests.FF.nunit" -f $revision
      $outputFile = "$p\Artifacts\{0}\Source\Src\Automation\WebProject.SeleniumTests\console-test.xml" -f $revision
      $nunitCmd = "& `"C:\Program Files (x86)\NUnit 2.6.3\bin\nunit-console-x86.exe`" $nunitProjFile /xml:$outputFile"
      Write-Host $nunitCmd

      Invoke-Expression $nunitCmd
      Write-Host "exit code is " $LASTEXITCODE
       
      if ($LASTEXITCODE -ne 0)
      {
          throw "One of the selenium tests failed. The acceptance stage is compromised and the job ends with error"
      }

      Before executing the selenium tests, related connection strings must be programmatically modified to point the correct database and web address of the deployed in previous step web application.
      Selenium server should be started on the Jenkins machine in order tests to be successfully executed.
      When even one of the tests fail, the job is terminated completes as failed.

      Related links:

      https://wiki.jenkins-ci.org/display/JENKINS/Copy+Artifact+Plugin
      https://wiki.jenkins-ci.org/display/JENKINS/Email-ext+plugin
      http://technet.microsoft.com/en-us/magazine/ff700227.aspx - how to enable PS remoting

      Read full article!