1. create a supplemental config file
2. do it programmatically by using SPWebConfigModification class
After the setup of the web application as claim-based we need to modify next web config files in order to get this working:
1. Adjust the web.config of the Central Administration site
2. Adjust the web.config of STS (Security Token Service)
3. Adjust the web.config of our claim-based web application
This article describes how to provision all clam-based related settings with Visual Studio Installer and includes next major steps:
• creating membership database
• creating supplemental web config file based on created membership database
• modifying web.config of STS
• modifying web.config of Central Admin
• running PowerShell scripts during the installation process
For my article I adopted the approach with supplemental config file.
How does supplemental web config work?
Once you have your supplemental web.config file (called for example webconfig.FBAHelper.xml) in 14\CONFIG folder, after creating new web application its content will be merged with the web config files of every newly created application. So, we pretty much need only to modify the web.config of STS and Central Admin applications to get the form-based authentication working.
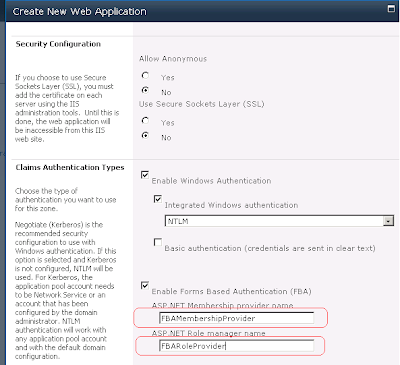
It is important to set the right names of the membership provider and the role manager, when setting up the claim based authentication in SharePoint. They must correspond to those from generated supplemental config file.
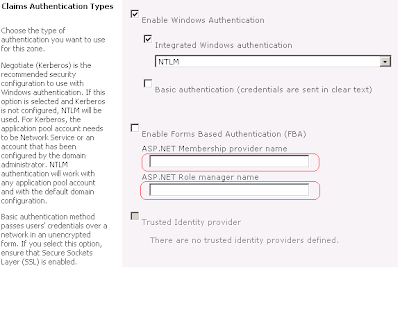
In the source code of the installer you will see that their names are hard-coded, but you can improve it and refine it in way which fully fits your needs.
The process of setting up FBA can be described with next major steps:
1. Run the Visual Studio Installer, which creates for you the membership database, generates supplemental config file and places it in 14\Config folder, modifies the web.config of STS
2. Create and setup FBA web application and put the right names for membership provider name and role manager. At this point the supplemental configuration file from step 1) will be merged with the web.config file of the newly created application.
Let’s get started with this and review the process in details step by step.
• First we will need a windows form in our VS Installer, in which the user can setup the credentials and name of the membership database that will be created:

There is nothing special about this dialog. During the installation process it passes the arguments needed for running aspnet_regsql.exe to the installer class. It doesn’t check if the sql user (in case you choose SQL Server authentication) has the appropriate roles for successfully running aspnet_regsql.exe. If you go for SQL Server authentication, the user must have the “dbcreator” role and if the aspnet_regsql is run against existing databse, the user must be assigned to it too. Connection string for the membership database will be created based on the input from this screen. This connection string will be placed in the supplemental web.config file along with membership provider and the role manager stuff.
• In the installer class we are gettting the input from the custom screen and starting aspnet_regsql.exe using PowerShell. There is a folder in the “CustomForms” project called PowerShellScripts. Currently there is one script only within it, which pretty much does nothing (honestly, I had different intentions about it when I started to develop this code sample, but I left them behind). But it is a good example for how to use PowerShell in the MS installers. This file is placed on the FileSystem of the installer and will be placed on the machine on which you run the installer. So, you will have the location of the script and can run it during installation process.

If you have experience with running PowerShell scripts you know that sometimes you need the short path to your script, otherwise its execution fails.
That is what public static extern int GetShortPathName servers for. It gives you the short path of script’s location.
• After membership database is successfully created, the connection string is generated (based on the input from the dialog form) and it is placed in the supplemental config. I make one very...clumsy check on executing aspnet_regsql.exe. I read the output of the process and if it ends with “Finished.”, i assume that the database is successfully created. Otherwise the installation is rolled back.
Well, at the next step generation of the supplemental config file and modification of the STS and Central Admin applications’ config come in place. SupplementalWebConfigManager class in the “CustomForms” project has 3 static methods: CreateSupplementalConfig, ModifySTSWebConfig and ModifyCentralAdminConfig. Linq to XML is used in all of them for generating and modifying xml. Pretty much they get as parameter path to the file which they must generate/modify and the generated connection string. That is all.
NB: The paths to the config files of Central Admin and STS are hard-coded in the installer, so you can either change it if you use the installer or add it as input to the custom form. It might be a good decision for example to fetch the central admin through the PowerShell script using something like this:
$adminwebapp = Get-spwebapplication -includecentraladministration | where {$_.IsAdministrationWebApplication}
You can even modify its config file with the PowerShell script. Anyway, for the Central Admin you must change the path and to make it valid according your SP server.
Here it is how our supplemental config should look in our case:

Let’s give it a try using both Windows authentication and SQL Server authentication and see how it works step by step.
1) SQL Server Authentication
Create new user of type SQL Server Authentication. Give him name “fba” and password “fba”. Assign him “dbcreator” server role.
We can start our installer on the SharePoint server.
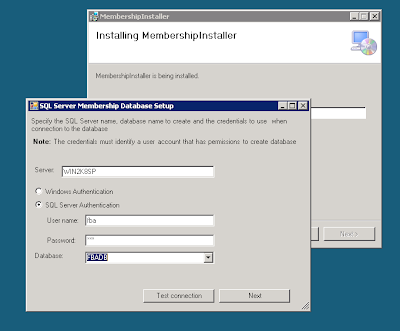
After the installation process finishes, we can go check that next things have happened:
• we have the product (in our case called MembershipInstaller) installed
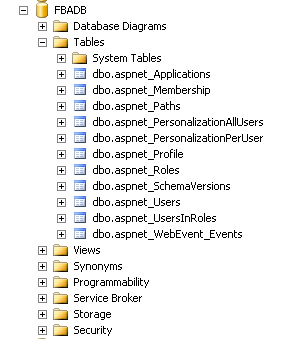
• Membership database is created
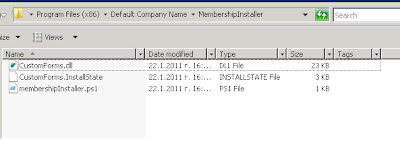
• The supplemental config file is generated and placed within the CONFIG folder
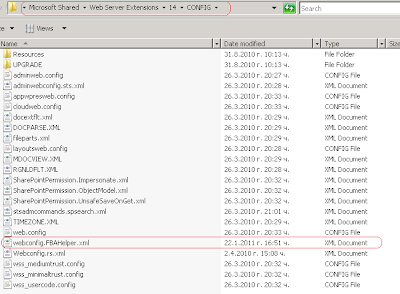
• The web.config of our newly created application is merged with our supplemental config file
We can go to C:\inetpub\wwwroot\wss\VirtualDirectories\36816 and open the web.config (36816 is the port of our new web application). All settings from the supplemental config should be there.

The connection string is also added to the very same web.config file.
• STS web.config is modified
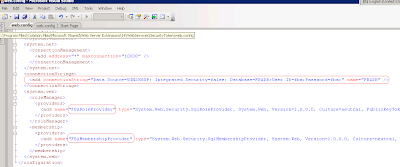
• Central Admin web.cofing is modified

If all of the points above are valid, we can go ahead, create new web application in central admin, add a user in our membership database and see if we can log in with him in the SharePoint web application.
We can create new web application in Central Admin. As I mentioned earlier, we should put the same values for ASP.NET Membership provider name and ASP.NET Role manager name as those from generated configs.
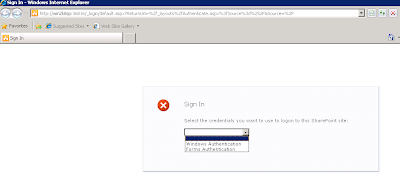
After successful creation of the application and its site collection, we can check that the login page appears when try accessing our web application.
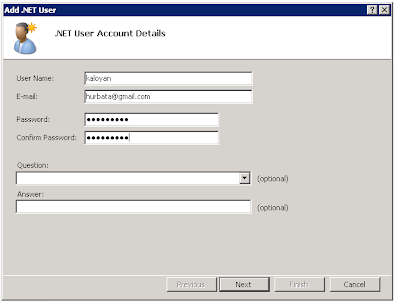
Let’s add one user in the membership database.
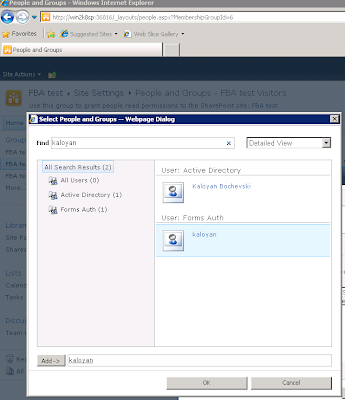
Now, we can add this user in the Visitor’s group in SharePoint.
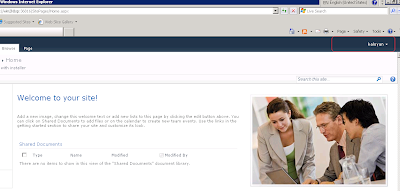
At last we can login using our membership account.
2) Windows Authentication
The only difference with “SQL Server authentication” option in our installer will be the generated connection string.

The rest of the steps that should be taken are the same as the listed above.
This installer can be improved and you can have let’s say additional steps for setting up the policy for the membership provider. Or you can run whatever you want in the PowerShell script. You can also modify the code which generates the supplemental config file in order to serve your needs.
May be you can add uninstall action and remove the supplemental config on it. Otherwise every newly created web application will merge its web.config with the content of the supplemental config.
I hope this article was helpful. You can download the related source code here. Any feedback is appreciated.
Read full article!


